 Pin It
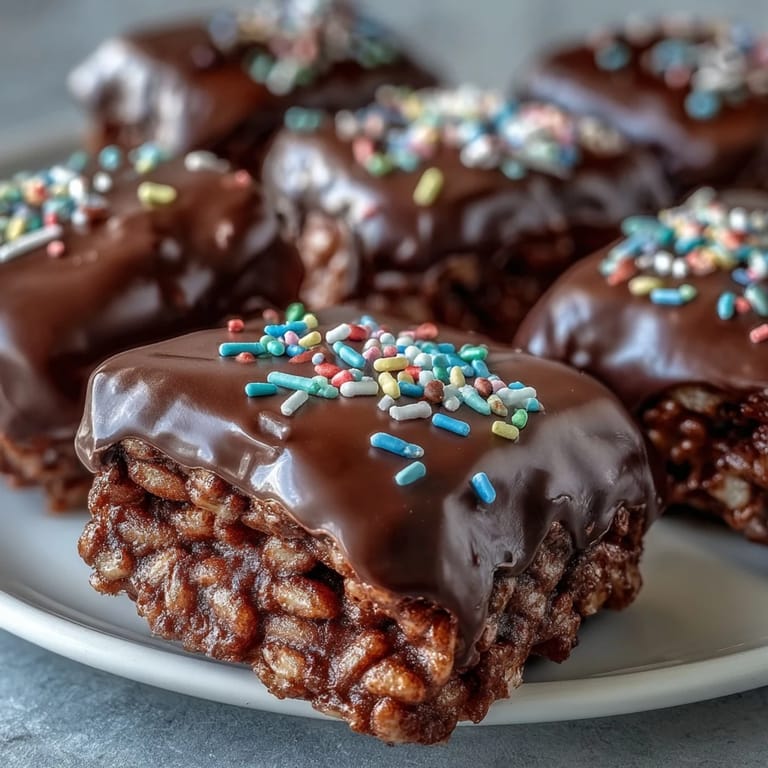
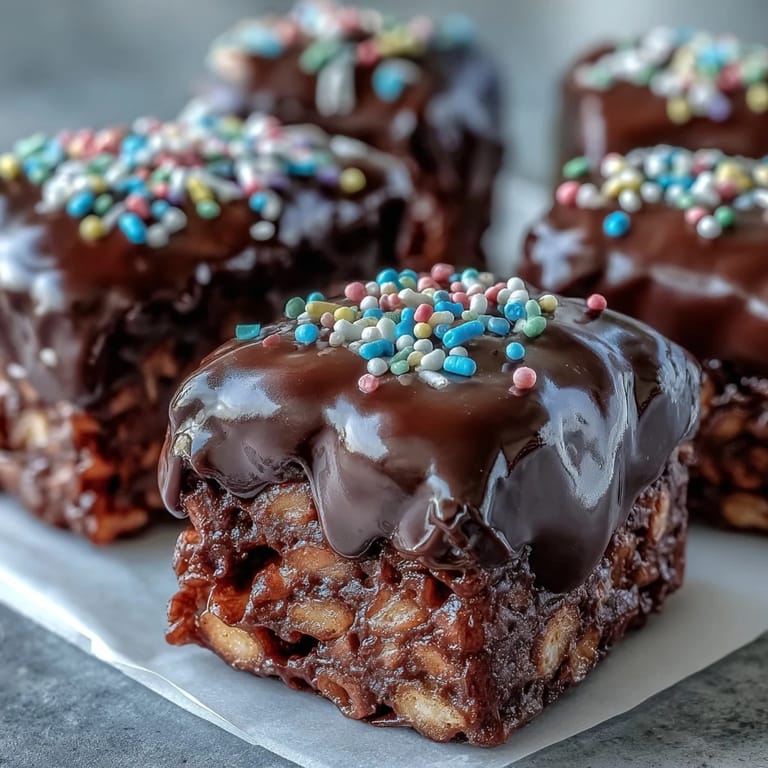
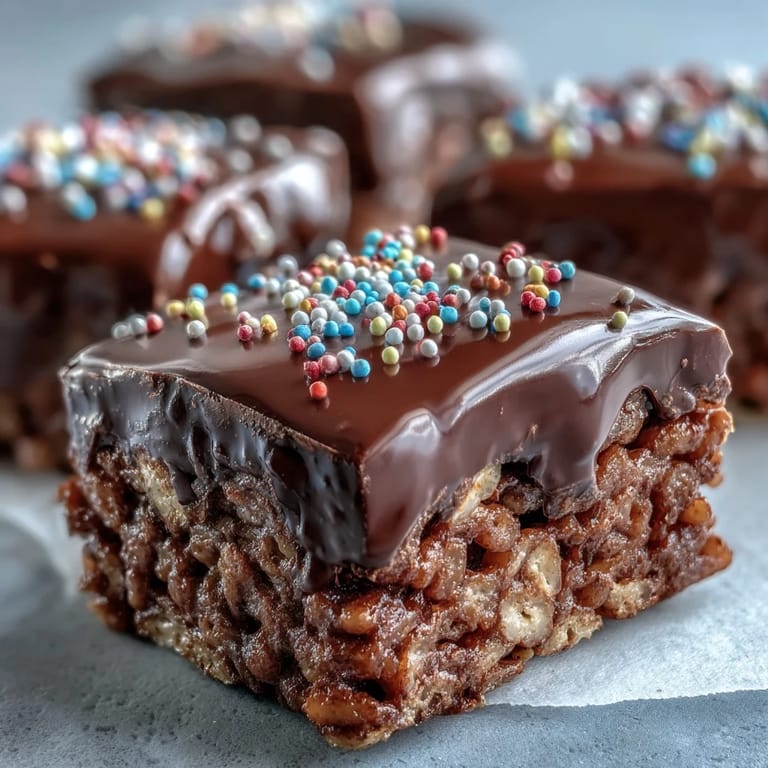
 My nephew grabbed one from the counter before I could even plate them properly, and within seconds his face lit up like I'd just performed magic. That's the thing about chocolate-covered Rice Krispy treats—they hit you with three textures at once, and your brain doesn't know whether to focus on the snap of the chocolate shell, the sticky sweetness underneath, or the airy crunch in the middle. I'd been making the regular kind for years, but one rainy Saturday I had leftover chocolate chips and thought, why not? Now I can't go back to the plain version.
I brought a batch to a potluck once, stacked in a clear container with parchment between the layers, and watched them disappear before the main course even hit the table. One friend asked if I'd bought them from a bakery, and I had to laugh because the whole thing came together while I was still in my pajamas. There's something deeply satisfying about handing someone a treat that looks complicated but required nothing more than patience and a good spatula. Even my mother-in-law, who usually critiques everything, asked for the recipe.
Ingredients
- Unsalted butter (6 tablespoons, plus extra for greasing): This is your glue—it melts the marshmallows into that glossy, stretchy base, and a little extra on your hands or spatula will save you from a sticky disaster when you press everything into the pan.
- Mini marshmallows (10 ounces): The minis melt faster and more evenly than the big ones, which means you spend less time stirring and worrying about scorched spots on the bottom of your pot.
- Rice Krispies cereal (6 cups): Use the real stuff if you can—off-brand cereals sometimes go soggy faster, and you want that signature crisp snap to hold up under all that chocolate.
- Fine sea salt (¼ teaspoon, optional): A pinch here doesn't make it salty, it just wakes up the sweetness and keeps the whole thing from tasting flat.
- Semisweet or dark chocolate chips (1 ½ cups): Semisweet balances the sugar, dark adds a grown-up edge—either way, the oil you mix in will give you that smooth, glossy pour.
- Vegetable oil or coconut oil (1 teaspoon): This thins the chocolate just enough so it spreads like silk instead of clumping, and it helps the coating stay shiny even after it sets.
- Rainbow sprinkles or chopped nuts (2 tablespoons, optional): Sprinkles make it playful, nuts add crunch and richness—I've done both at once and no one complained.
Tired of Takeout? 🥡
Get 10 meals you can make faster than delivery arrives. Seriously.
One email. No spam. Unsubscribe anytime.
Instructions
- Prep your pan:
- Grease an 8x8 or 9x9-inch square pan with butter, getting into the corners so nothing sticks later. If you line it with parchment, leave some overhang—it makes lifting the whole block out so much easier.
- Melt the butter:
- Set your saucepan over low heat and melt the butter slowly, stirring so it doesn't brown or separate. Low and slow is the mantra here—rushing will scorch the bottom.
- Add the marshmallows:
- Dump in the mini marshmallows and keep stirring until they collapse into a smooth, glossy pool. It'll smell like a campfire in the best way.
- Season the base:
- Pull the pot off the heat and stir in the salt if you're using it. This is also when I sometimes sneak in a splash of vanilla, though it's not required.
- Fold in the cereal:
- Add all the Rice Krispies at once and fold gently with a spatula until every piece is coated. Don't crush them—you want to keep that airy crunch intact.
- Press into the pan:
- Scrape the mixture into your prepared pan and press it down evenly with a buttered spatula or your hands. Firm but not aggressive—you're packing it, not squashing it.
- Let it rest:
- Leave it on the counter for about ten minutes so it firms up just enough to hold the chocolate without sinking. This is a good time to clean your pot.
- Melt the chocolate:
- Combine chocolate chips and oil in a microwave-safe bowl, then heat in thirty-second bursts, stirring after each, until it's smooth and glossy. Don't skip the stirring or you'll get seized chocolate.
- Pour and spread:
- Pour the melted chocolate over the cereal layer and spread it evenly with an offset spatula or the back of a spoon. Work quickly—it starts to set faster than you think.
- Add the garnish:
- Scatter sprinkles or chopped nuts over the wet chocolate right away. Once it hardens, they won't stick.
- Let it set:
- Leave the pan at room temperature for at least an hour, or pop it in the fridge for twenty to thirty minutes if you're impatient. The chocolate should be firm to the touch.
- Cut into bars:
- Lift the block out using the parchment overhang, or flip it onto a cutting board. Use a sharp knife and wipe it between cuts for clean edges.
 Pin It
 I made a double batch for my daughter's bake sale last spring, and she came home with an empty container and a note from another parent asking if I sold them. I don't, but that moment—knowing something I made in my own kitchen could spark that kind of response—reminded me why I love this recipe. It's not fancy or complicated, but it makes people happy, and sometimes that's the whole point of baking.
How to Store and Keep Them Fresh
I stack mine in an airtight container with parchment or wax paper between the layers so the chocolate doesn't stick. At room temperature, they'll stay good for three days, but in the fridge they last a full week and the chocolate gets this nice snap when you bite in. Just let them sit out for a few minutes before serving if you refrigerate them, or they'll be too hard to bite through comfortably. I've never tried freezing them because they've never lasted long enough to need it.
Flavor Twists You Can Try
White chocolate with pastel sprinkles turns these into perfect baby shower or Easter treats, and the milder sweetness is a nice change. I've also stirred a tablespoon of peanut butter into the marshmallow mixture and topped them with chopped Reese's cups, which my husband declared better than the original. If you want to get fancy, drizzle melted white chocolate over the dark chocolate layer in thin lines and drag a toothpick through for a marbled effect. It looks bakery-level but takes about thirty extra seconds.
What to Do If Things Go Wrong
If your marshmallow mixture hardens before you get the cereal in, just pop it back on low heat for a few seconds and stir until it loosens up. Seized chocolate can sometimes be saved by whisking in a teaspoon of warm cream or oil, though it won't be as glossy. If the bars come out too soft and won't hold their shape, they probably weren't pressed firmly enough—next time, really pack that mixture down. And if the chocolate cracks when you cut, it means it set too hard in the fridge—let it warm up on the counter for ten minutes first.
- Keep a bowl of warm water nearby to dip your spatula in if the marshmallow mixture starts sticking to everything.
- If you don't have parchment, a light coat of nonstick spray works just as well for getting the bars out of the pan.
- Day-old bars are sometimes better than fresh because the flavors meld and the texture firms up just a bit more.
 Pin It
 These treats have this way of turning an ordinary afternoon into something a little sweeter, whether you're making them with kids or just need a quick win in the kitchen. I hope they become one of those recipes you reach for without thinking, the kind that makes people smile before they even take a bite.
Recipe FAQs
- → How do I prevent the marshmallow from sticking to everything?
Butter your spatula or hands lightly before pressing the mixture into the pan. This creates a non-stick surface and makes spreading much easier.
- → Can I use white chocolate instead of semisweet?
Absolutely! White chocolate creates a beautiful contrast and pairs wonderfully with the cereal crunch. Just melt it the same way with a teaspoon of oil for a glossy finish.
- → Why is my chocolate topping streaky or dull?
This happens when chocolate seizes from overheating or moisture. Stick to 30-second microwave intervals and avoid getting water in the chocolate. Letting it cool slightly before pouring also helps.
- → How long do these stay fresh?
Store in an airtight container at room temperature for up to 3 days, or refrigerate for up to a week. The chocolate may bloom slightly if refrigerated, but this doesn't affect taste.
- → Can I freeze these treats?
Yes! Wrap individual bars in plastic wrap and freeze for up to 2 months. Thaw at room temperature for about 30 minutes before serving. The texture remains surprisingly good.