 Pin It
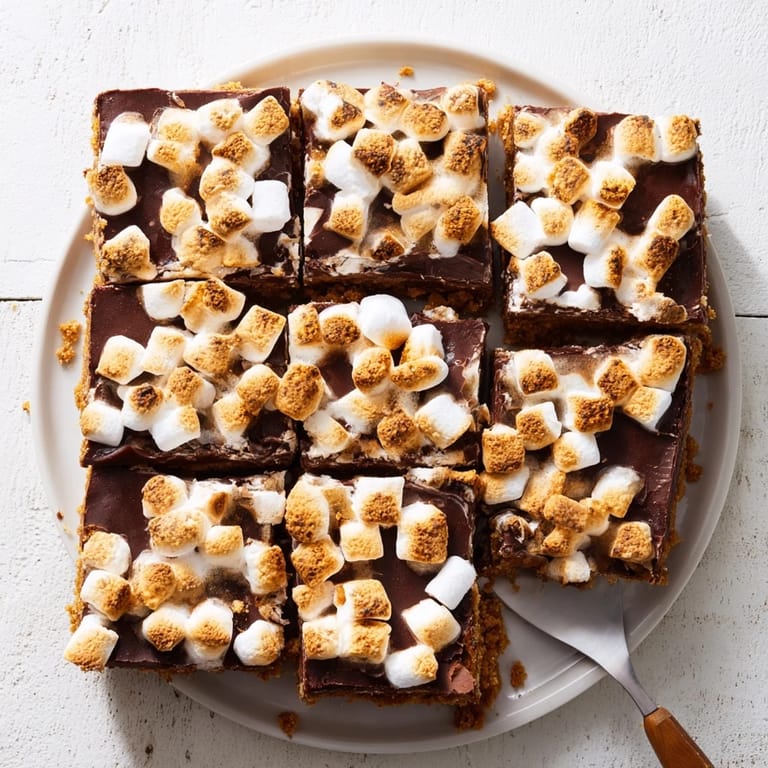
 The smell of toasted marshmallows takes me back to summer camping trips where we'd crowd around a fire, sticky fingers and burnt marshmallows everywhere. These bars capture that same magic without needing a campfire or perfect weather. I made them on a rainy Tuesday when my kids were begging for something sweet, and the whole house smelled like a memory I didn't know I was missing. They've been in regular rotation ever since.
Last summer, I brought these to a neighborhood potluck and watched them disappear in under ten minutes. My neighbor's daughter asked if I'd been camping all weekend just to make them, which felt like the highest compliment. There's something about that combination of textures—the crunch, the gooey chocolate, the pillowy marshmallow—that makes people instantly happy.
Ingredients
- Graham cracker crumbs: These form the buttery foundation that holds everything together. I pulse whole crackers in my food processor for the perfect texture, but store-bought crumbs work beautifully too.
- Unsalted butter: Melted butter binds the crust and adds that rich, indulgent flavor that makes s'mores so satisfying.
- Granulated sugar: Just enough to sweeten the crust without overpowering the chocolate and marshmallow layers.
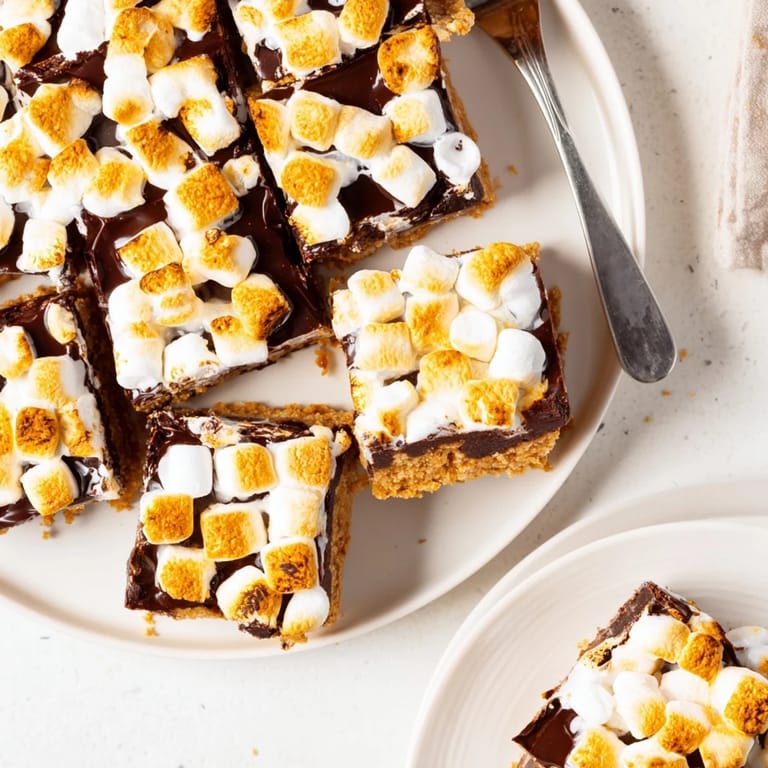
- Semi-sweet chocolate chips: The perfect balance of sweetness. Milk chocolate makes these almost too sweet, while dark chocolate loses that nostalgic campfire taste.
- Mini marshmallows: These melt and toast more evenly than large ones. I've learned that buying an extra handful never hurts, especially if your family starts snacking during prep.
Tired of Takeout? 🥡
Get 10 meals you can make faster than delivery arrives. Seriously.
One email. No spam. Unsubscribe anytime.
Instructions
- Prepare your pan and preheat:
- Line an 8x8-inch baking pan with parchment paper, letting the edges hang over like handles. Preheat your oven to 350°F. This overhang becomes your best friend later when lifting out the whole batch.
- Make the graham cracker crust:
- Mix the crumbs, melted butter, and sugar in a medium bowl until every crumb looks evenly coated and the mixture holds together when squeezed. Press it firmly into your prepared pan using the bottom of a measuring cup for an even layer.
- Pre-bake the crust:
- Bake for 8 minutes until lightly golden and fragrant. This step prevents a soggy bottom later, which I learned the hard way after skipping it once.
- Add the chocolate layer:
- Scatter chocolate chips evenly over the warm crust and return to the oven for 2 minutes. The chips will look shiny and slightly soft—this is when you spread them gently with a spatula into an even layer.
- Top with marshmallows and toast:
- Spread mini marshmallows over the chocolate, pressing lightly so they adhere. Bake for another 10 to 12 minutes until they're puffed and golden brown with delicious toasted spots.
- Cool completely before slicing:
- Let the bars cool completely in the pan, then refrigerate for 1 hour. This patience test is crucial for clean cuts. Lift them out using the parchment handles and slice into 16 squares.
 Pin It
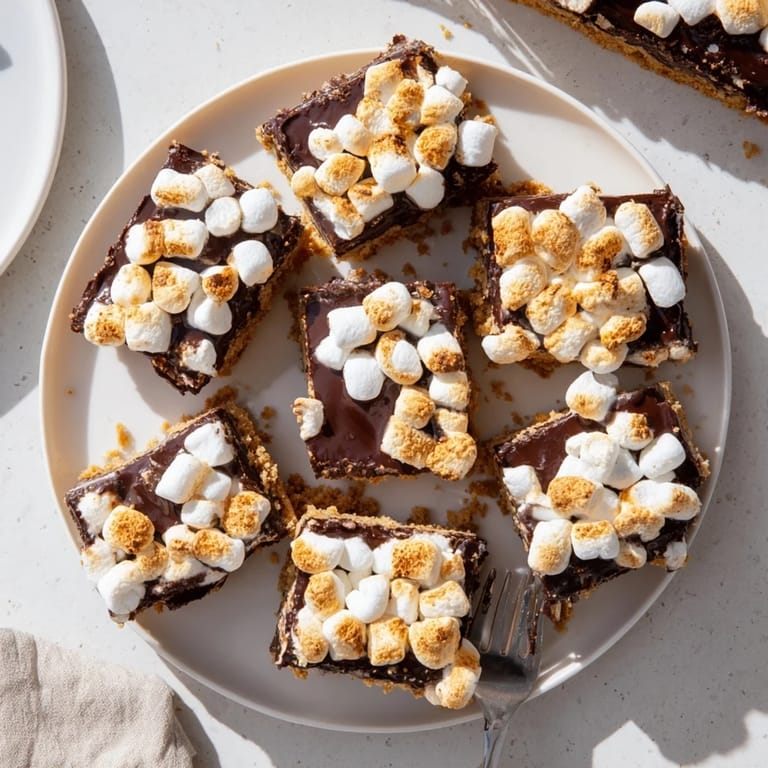
 These became my go-to birthday treat for my youngest who claims marshmallows are their own food group. We've made them for sleepovers, school bake sales, and just because Tuesday needed something special. There's always someone asking if there are any left in the pan.
Getting That Perfect Toast
I've discovered that broiling the marshmallows for the last 60 seconds creates those gorgeous campfire-charred spots, but you have to stand right there watching. The second they turn golden, grab them out. The line between toasted and ruined is terrifyingly thin.
Storage Secrets
These bars actually taste better the next day when the flavors have had time to mingle. I store them in an airtight container at room temperature for up to three days, though they rarely last that long. The marshmallows do get slightly less fluffy, but the chocolate stays perfectly gooey.
Serving Ideas
Sometimes I drizzle melted chocolate over the top after they've cooled for an extra fancy touch that looks impressive but takes zero skill. Other times, I press a few extra graham cracker pieces into the marshmallow layer before baking for that classic s'mores crunch.
- Serve slightly warm with a glass of cold milk for the ultimate comfort dessert
- Cut them smaller for party bites that people can pop in their mouths whole
- Try crushing a few graham crackers over the top just before serving for extra texture
 Pin It
 Hope these bring as much joy to your kitchen as they've brought to mine. There's something magical about capturing campfire memories in a pan.
Recipe FAQs
- → How do I store these bars?
Store in an airtight container at room temperature for up to 3 days. For longer storage, refrigerate for up to a week, though the texture may become slightly firmer.
- → Can I make these ahead of time?
Yes, prepare up to 2 days in advance. Keep refrigerated and bring to room temperature before serving, or warm briefly in the microwave for that freshly baked gooey texture.
- → What type of chocolate works best?
Semi-sweet chocolate chips provide the classic flavor balance. Milk chocolate creates a sweeter version, while dark chocolate adds sophisticated depth. Use whatever you prefer most.
- → Why chill before cutting?
Refrigerating for an hour firms up the chocolate and marshmallow layers, allowing for cleaner cuts with less mess. Warm bars are delicious but can be challenging to slice neatly.
- → Can I use a different pan size?
A 9x13-inch pan will create thinner bars, adjusting baking time slightly. A smaller pan yields thicker, richer squares. The 8x8-inch size provides the ideal thickness and texture balance.
- → How do I get the marshmallows extra toasty?
After baking, place under the broiler for 30-60 seconds. Watch carefully as marshmallows can burn quickly. This creates that authentic campfire charred flavor and appearance.